Dark or pigmented lips are one of the most challenging cases in permanent makeup. Without the right technique, results can appear uneven, and the natural undertone may still show through after healing. Achieving controlled, even, and stable results while minimizing skin trauma requires not just skill but a detailed understanding of the process.
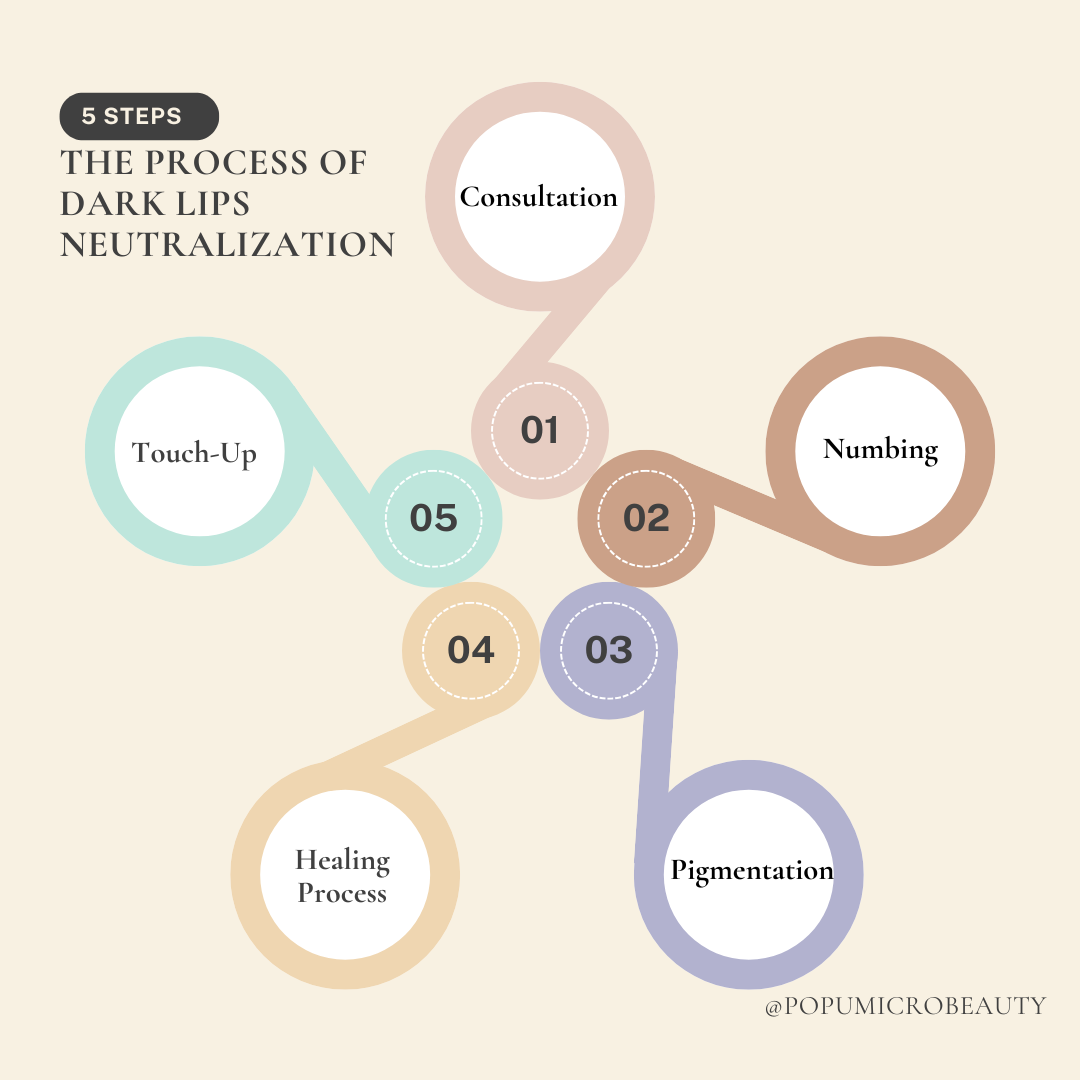
In this guide, we break down five key steps that professional PMU artists rely on when neutralizing dark lips, along with tips on tools, techniques, and common pitfalls.
Five Key Steps
Step 1: Choose the Right Needle
The needle you use directly affects how pigment is implanted and how the skin responds. For pigmented lips, professionals often recommend medium taper needles or divided 3RLs, which provide smoother pigment flow and efficient implantation while minimizing trauma.
|
|
Why it matters:
Using an unsuitable needle often requires multiple passes, increasing irritation and prolonging healing. On delicate lip skin, repeated passes can cause swelling, scabbing, and uneven pigment retention.
Pro tips:
-
Test the needle on a small area before full application.
-
Avoid overly fine needles for dense pigmentation—they require too many passes.
-
Keep consistent depth to avoid patchiness.
-
Proper needle selection sets the foundation for every subsequent step. Without it, even the best color choices or techniques may fail.
|
Step 2: Select the Correct Pigment Mix
Dark lips vary in depth and undertone, which means a single pigment rarely neutralizes effectively. Professionals categorize lips by pigmentation level and undertone (cool, warm, or neutral) to guide color choice.
Color logic:
-
Warm pigments (reds, oranges, subtle golds) counteract bluish or purple undertones.
- Cooler pigments may be used sparingly to balance over-brightness.
|
Step 3: Use a Stable, Powerful Machine
The stability of your PMU device greatly affects how efficiently pigment is implanted. Dark or full lips require more pigment, and repeated passes with an underpowered machine can traumatize skin.
Why it matters:
-
Each pass introduces trauma; multiple passes increase swelling, redness, and uneven healing.
-
A stable machine allows controlled pigment implantation in fewer passes, improving both comfort and outcome.
Pro tips:
-
Maintain consistent speed and pressure.
-
Use a machine capable of steady power for dense shading.
-
Pause and assess frequently—overworked lips can become darker, not lighter.
-
A powerful, stable machine allows the artist to work efficiently, reducing healing complications and ensuring a more predictable final result.
|
Step 4: Stretching is Essential
Lip skin is soft, elastic, and highly mobile. Proper stretching is crucial to prevent the needle from sliding and to achieve even pigment deposition.
Why it matters:
Without sufficient tension, needles can bounce or skip, causing patchy results or uneven saturation. Even minor inconsistencies are noticeable after healing.
Pro tips:
-
Use cotton rolls, gloved fingers, or specialized tools to create uniform tension.
-
Stretch in multiple directions for full coverage.
-
Maintain consistent tension throughout each stroke.
Proper stretching not only stabilizes the needle but also reduces trauma, ensuring smoother pigment placement and better healing.
|
|
Step 5: Master the Shading Technique
Shading determines the final density, smoothness, and overall appearance of neutralized lips. Professionals adopt slow, controlled, and overlapping strokes to achieve a seamless result.
Key points:
-
Maintain ~80% overlap between strokes to ensure even pigment distribution.
-
Avoid rushing—fast strokes lead to uneven color, inconsistent healing, and patchiness.
-
Adjust pressure subtly for natural gradation, especially near lip edges.
Pro tip:
-
Focus on layering pigment gradually. Multiple light passes are safer than heavy single passes.
-
Observe how the pigment interacts with melanin-rich areas; adjust tone accordingly.
Correct shading transforms dark lips into a smoother, lighter, and more balanced canvas while preserving a natural look.
|
Aftercare and Recovery Tips
Even the most skilled technique depends on proper healing. Professional lip artists advise:
1. Avoid over-touching or exfoliating lips in the first 7–10 days.
2. Protect from sunlight to prevent additional pigment darkening.
3. Use recommended healing ointments to maintain moisture and prevent scabbing.
4. Observe skin reactions—uneven fading may require a controlled touch-up.
Following aftercare guidelines helps retain even color and ensures longevity of the treatment.
|
Conclusion: Control Every Detail for Professional Results
Neutralizing dark lips is not about a single trick—it’s a combination of controlled factors:
-
Choosing the right needle and pigments
-
Using stable equipment
-
Proper stretching and shading technique
-
Consistent aftercare
Mastering these fundamentals allows professional PMU artists to create predictably beautiful, natural-looking lips for clients with dark or pigmented lips.
Consistent technique, thoughtful pigment selection, and careful handling of sensitive lip skin are the keys to professional results. Even small details can make a significant difference in the final appearance.
|


Comentarios